Step 1: Install grunt globally. To know more visit here
npm install -g grunt-cli
it will install grunt globally which need to call for installing grunt others plugin.
Step 2: Now need to add grunt library for project deploy
Step 3: Add gruntfile.js to your project by right click project name>New>gruntfile.js or project name>New>others>Select Html5/Javascript>select gruntfile.js just as like below
it will install grunt globally which need to call for installing grunt others plugin.
Step 2: Now need to add grunt library for project deploy
- install grunt locally by npm install grunt –save-dev
- install grunt-contrib-qunit by npm install grunt-contrib-qunit –save-dev
- install grunt-contrib-copy by npm install grunt-contrib-copy –save-dev
- install grunt-contrib-clean by npm install grunt-contrib-clean –save-dev
Step 3: Add gruntfile.js to your project by right click project name>New>gruntfile.js or project name>New>others>Select Html5/Javascript>select gruntfile.js just as like below
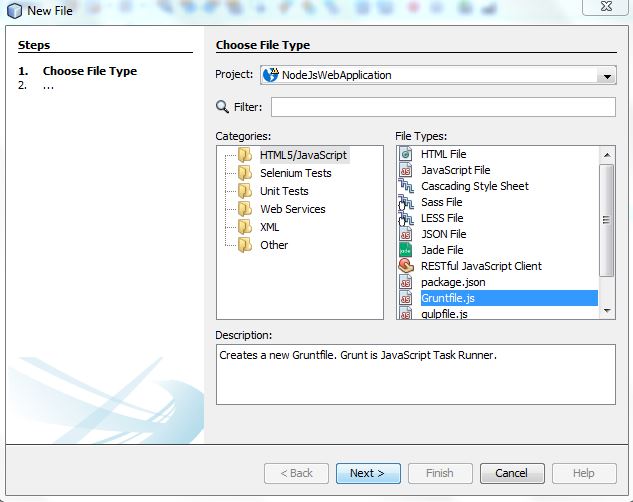
and write below codes in your gruntfile.js.
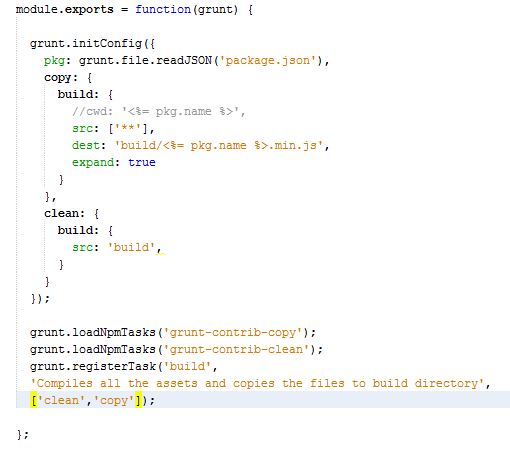
It will needed to avoid some exception like
Task “clean” not found. Use –force to continue
Or
Task “build” not found. Use –force to continue
Or
Task “build” not found. Use –force to continue
Step 4: Now right click to your project properties and select grunt from left and from right panel select first three things just like below
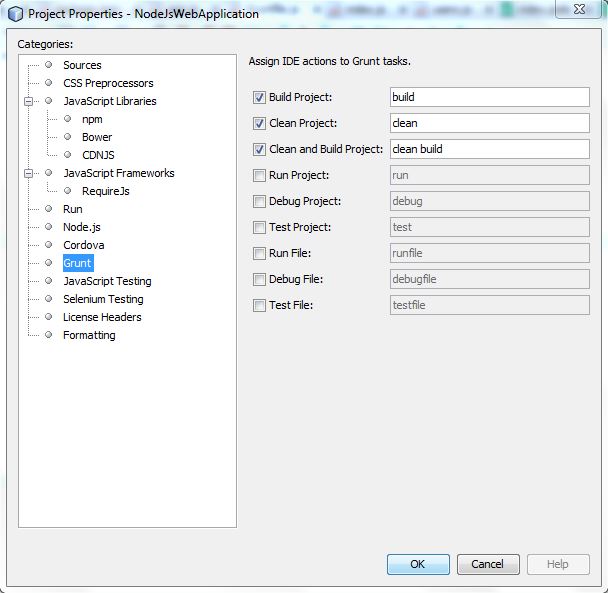
Ok you done. Now Build your project through Run>Build. Then you can see a build Directory just created in your project directory. Also by run>clean then you can see that build directory get cleaned.